
M.2 Drive: 7 Easy Steps Installation in No Time
One of the most trending and exciting technologies currently available in computer storage today is the M.2 drives. There is no need for large space on your unit because M.2 drive does not require any wiring for data and power. In fact, M.2 almost does not take up too much space in your system unit.
Aside from that, it also allows you to use NVMe drives. Great isn't it.
M.2 Drive Installation Guide
You now have the best way to improve your computer's performance. But before you do it, you should check out your computer first, before joining the bandwagon. Not all computers are compatible with this type of storage. So you should check your motherboard if it will support your upgrades.
And if you finish checking up and ready for upgrades. Let's now install your M.2 SSD
M.2 SSD installation is so easy. It is because it does not require any wiring. You'll just have to prepare the small Phillips head screwdriver and a small 5mm hex screwdriver. Take note that not all system units require these drivers.
Installing M.2 Drive
1. Find an open the M.2 Socket
Motherboards are not all the same, some may have up to 3 sockets, it depends on the type. You can check out your motherboard manual to find out where is the M.2 socket. Some sockets are hidden below the video card so you might as well check it out.
2. Keep an eye on your SSD screws
Your Velocity Micro order comes with a small bag of screws. These screws are used for mounting an M.2 drive. Keep an eye on these little things for it is very small and easy to lose.
If you are not familiar with how it looks like, you can consult your motherboard manual for the list of all parts and accessories that are included in the package. SSD screws are very important to secure that your M.2 SSD is in place. So make sure that you keep an eye on these little things.
3. Time to Connect your SSD
Some boards have a pre-installed hex screw and if your board doesn't have one you can install it now with a 5mm hex screwdriver. But make sure not to over-tighten it.
Usually, M.2 sockets have multiple spots for hex screw and it still depends on the length of your M.2 drive. Most M.2 has a label beside each hole that denotes its specified length and the most common length is 80mm.
4. Insert the M.2 Drive
Before you attach your drive, pay close attention to the notched cut-out on both sides. Line up the side with the gold contacts with the socket on the motherboard. Make sure that the gold contacts are aligned properly before you insert it.
5. Gently push the drive
After inserting, you will notice that the drive is sit up at a 45-degree angle and not fully lay flat in the socket. It is because the socket is spring loaded so that whenever you will remove the remove it will just pop up.
Now you can gently push the drive down while aligning the semi-circle cut-out together with the top of the hex screwdriver.
6. Secure your drive
After the insertion, you cannot secure your drive the small screw then you’re down installing your M.2 drive to your motherboard.
7. Driver Installation
That's it so simple but you are not yet done with the installation process. You still need to install the M.2 to your Windows. Windows installation process is at least the same if your M.2 is an NVMe. But if it is a non-NVMe, then you still have to do the other process. In M.2 NVMe installation, you need to install all your drivers. The installation also requires you to grab an additional driver for Windows storage controller. If you will not do this, your NVMe SSD will only give you half of its rated speed performance.
After doing the downloading and installation process you are done. You have just finished installing one of the most impactful computer upgrades; smooth and easy, right? Good luck on your upgrades and if you lose your small SSD screws, you can contact your favorite online computer parts provider for your M.2 SSD screws and M.2 SSD standoffs.
Similar Articles

Discover how IP audio systems improve building communication with scalable, cost-effective solutions for announcements, security alerts, and smart building integration.

Smart home technology has steadily reshaped how people manage their homes, but the introduction of voice control has accelerated that shift in remarkable ways

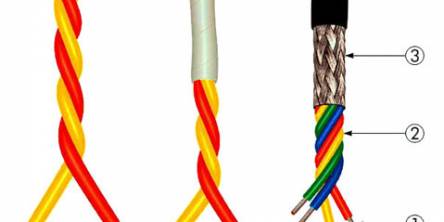
Cable and wire solutions that are custom-designed are more frequent than most engineers first think.

Finding the ideal RF/microwave cable assembly can be daunting due to the wide variety of available products and the numerous aspects of each
When it comes to high-performance materials for various industrial applications, PTFE (Polytetrafluoroethylene) stands out as a top choice

More than an inconvenience, power cuts compromise work, comfort, and even safety at home. The solution? Buy a much-needed power backup device - an inverter!

Equipment like telescopes, satellites, and various industrial solutions are more sensitive to electrical interferences now, more than ever. In case of a power generator, telecommunication systems, or sophisticated manufacturing facilities, monitoring the direct current parameters is of utmost importance

Discover how to source high-quality, affordable LED downlights for commercial projects. Learn key factors like supplier reliability, customization, and cost-efficiency.

When most people think of industrial control panels, they picture factories, power plants, or maybe a water treatment facility. But these unsung heroes of automation and control are found in some of the most unexpected, and downright bizarre, places