

How To Install Exterior Shutters on Brick Homes

Exterior shutters can make a brick house stand out, adding personality and charm. Homeowners often wonder if installing shutters on brick is a challenge, and it’s a valid concern. After all, working with brick isn't like attaching things to wood or siding. It’s a tougher surface that requires the right approach and tools, but with some careful preparation and attention to detail, it’s totally achievable.
This blog covers all the essentials, walking you through each part of the process. Whether aiming to boost curb appeal or add a finishing touch to your dream home renovation, knowing how to properly install exterior shutters on brick makes a world of difference. With the right guidance, it’s not as hard as it seems. Let’s get started.
Choose the Right Shutters
Picking the perfect shutters for your brick home doesn’t have to be complicated, but it requires some thought.
Consider the Style of Your Home
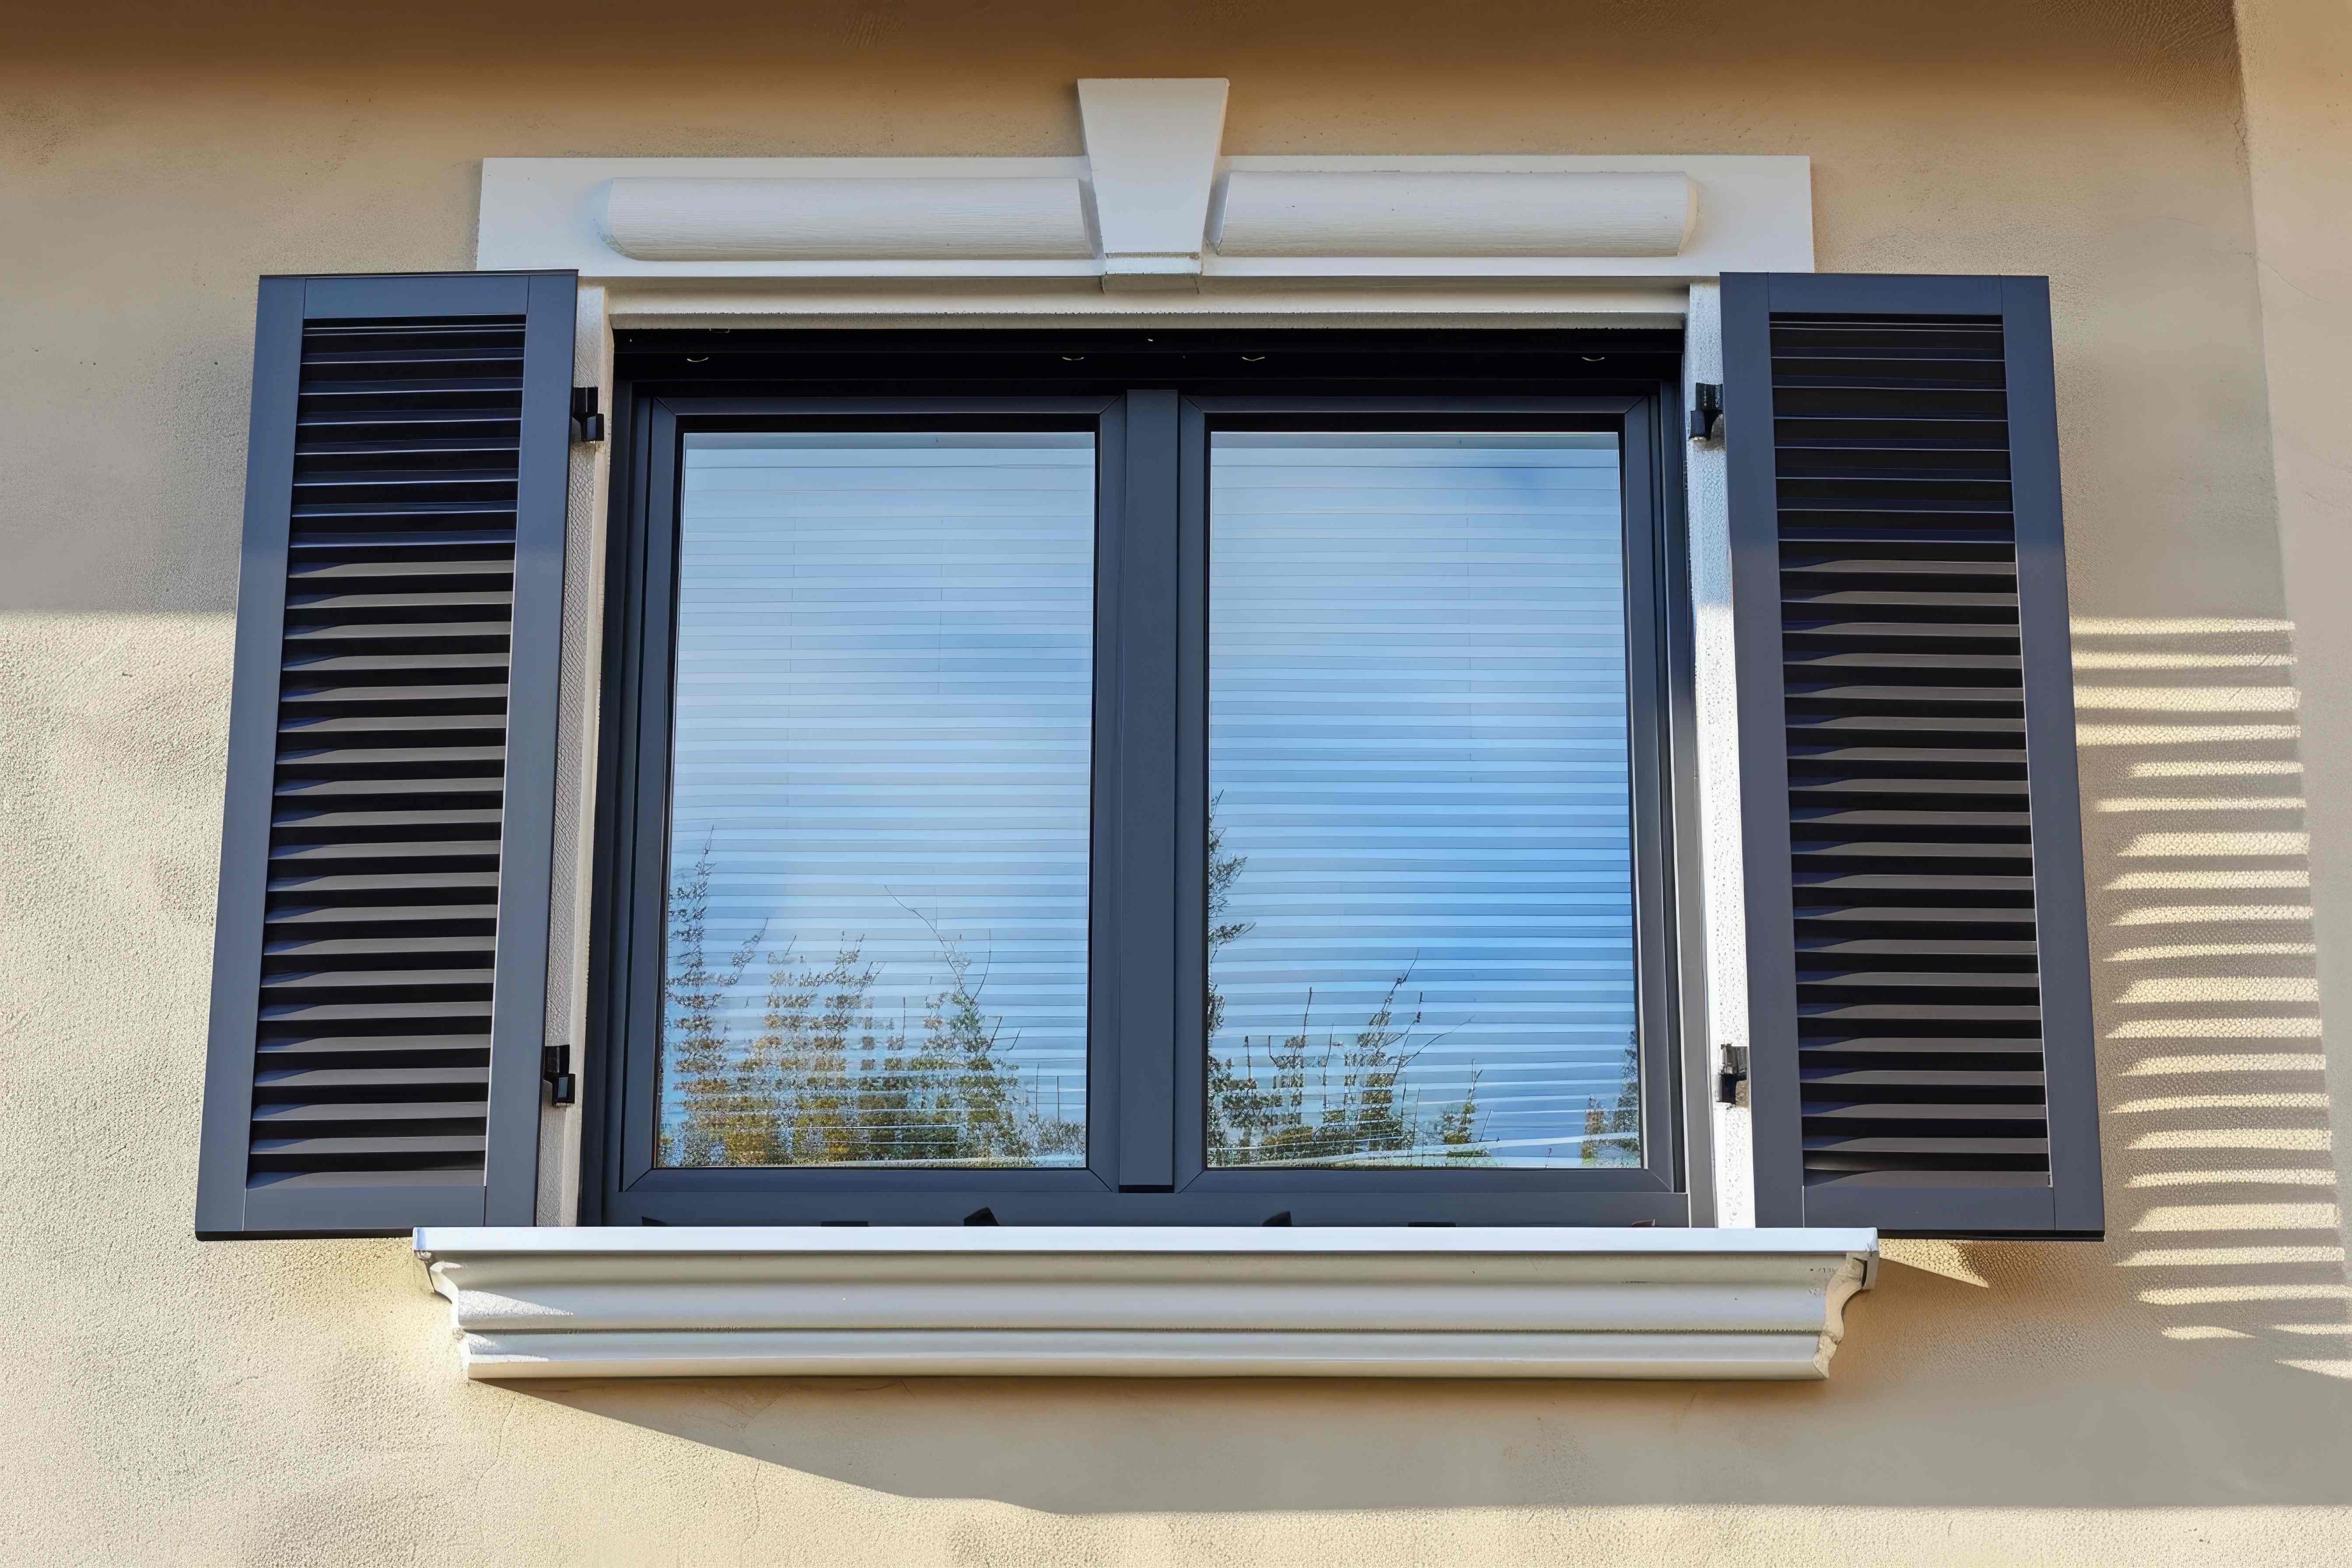
It’s important to select a style that complements your home's architecture. PVC Exterior Shutters are a great option for a traditional brick home. Board-and-batten shutters could provide the perfect aesthetic touch if your home leans toward a more rustic or farmhouse style because they offer a sleek and durable look that blends well with classic designs. The right shutters should feel like a natural extension of your home’s personality, enhancing curb appeal without feeling out of place.
Material Matters
The material you choose for your shutters will impact their appearance and longevity. Wooden shutters are undeniably beautiful but require more maintenance and can warp or crack over time, especially when exposed to harsh weather. PVC shutters, however, offer the same visual appeal but with far less upkeep. They are resistant to weather damage, making them ideal for homeowners who want a hassle-free option that still looks great year after year.
Functionality vs. Decoration
Another decision is whether you want your shutters to be functional or purely decorative. Decorative shutters are fixed in place and only enhance the home’s appearance. Functional shutters, however, can be opened and closed, providing shade, privacy, or even storm protection. If you’re going for functionality, you’ll need to ensure the shutters have proper hardware, including hinges and latches, to work smoothly.
Measure Windows Correctly
Before purchasing, carefully measure the height and width of your windows. This prevents the common mistake of shutters being too large or small, which can throw off the look of your home. Leaving space around the shutters is also important for a balanced, polished appearance.
By making thoughtful decisions about style, material, and functionality, you’ll have shutters that look great and last for many years.
Prepare the Brick Surface
Start by cleaning the area where the shutters will be mounted, removing dirt, dust, or debris. You can use a stiff brush, soapy water, or a pressure washer for a more thorough cleaning. Make sure the surface is completely dry before proceeding to avoid moisture issues.
Inspecting the brick and mortar for cracks or damage is also important. Repair the area beforehand to ensure the mounting hardware holds firmly. This step ensures that your shutters will be securely installed and remain stable.
Install the Shutter Hardware
Begin by marking the placement for the mounting brackets or screws, ensuring they align with the pre-drilled holes in the shutters. Use a level to ensure the marks are even, as misalignment can affect appearance and stability. For brick homes, it’s recommended to use masonry drill bits to create pilot holes in the brick, avoiding the mortar lines to maintain structural integrity.
Once the holes are drilled, insert masonry anchors, providing extra support for the hardware. Secure the mounting brackets or screws into the anchors, ensuring they are tightly fastened to support the weight of the shutters. Proper hardware installation is key to keeping the shutters firmly in place, even in harsh weather conditions.
Hang the Shutters
Start by aligning the shutters with the installed brackets or screws, ensuring they're properly positioned according to your earlier measurements. If you're using hinges, attach the shutters to the hinge pins and check that they swing open and close smoothly. For stationary shutters, simply align them with the mounting hardware and fasten them securely using the appropriate screws or bolts.
It's important to double-check that the shutters are level and aligned with the windows, adjusting as necessary before tightening all hardware. Once hung, gently tug the shutters to ensure they are firmly attached and stable. Properly hung shutters enhance the aesthetic appeal of your home and provide additional protection from the elements.
Add Some Finishing Touches
If your shutters are made of wood, consider adding a fresh coat of paint or stain to match your home’s exterior. For a decorative touch, you can add shutter hardware like decorative hinges or shutter dogs (holdbacks) to give them a more traditional or stylish appearance. Additionally, consider weatherproofing the shutters, especially if they are made from wood or another material that can be affected by moisture and outdoor elements. This extra care not only elevates the visual appeal of your home but also helps protect your investment in the long run.
Final Thoughts
Installing exterior shutters on a brick home is a straightforward way to boost curb appeal while adding character and functionality. With careful attention to detail during installation, your shutters will be a stylish and durable feature for years. If you're ready to elevate your home's exterior, now is the perfect time to start your shutter project and give your home the transformation it deserves.
Similar Articles

Learn 6 practical interior upgrades for your compact roadster, from console shelves to phone mounts, that improve comfort and storage without clutter.

The most reliable way to keep outdoor stone looking its best through spring, summer and fall in 2026 is to match the product to the stain and the surface, rather than rely on a single all-purpose wash

Prepare your condo for professional management with a practical pre-onboarding checklist covering documents, finances, maintenance, and resident communication.

Discover 7 essential questions to ask when choosing a crawl space company for your coastal home, ensuring quality repairs, moisture control, and lasting protection.

A home sauna can sound like a luxury purchase, but for some households it becomes a feature that gets used regularly rather than occasionally. The real question is not whether a sauna is appealing. It is whether the cost makes sense for the way you live.

Learn what to consider before adding a fireplace to an open-plan home, including placement, heat output, furniture, materials, installation and maintenance.
Garage doors are used so frequently that it is easy to overlook the wear and tear they experience. Over time, moving parts can loosen, sensors can become misaligned, and small mechanical problems can develop into expensive repairs.

Most of the decisions that make or break a detached garage happen before a single wall goes up.

If you have ever cleared the dining table for a blow-up mattress, or given up your own bedroom for a week while relatives filled the house, you already understand the problem.