3 Simple Ways to Seal Laminate Flooring with Caulking

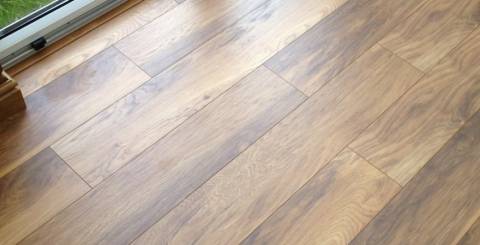
Due to its affordability, laminate flooring has become quite popular among homeowners thanks to its crisp appearance and durable locking edges. Homeowners realized that they could install it to replicate the look of hardwood without paying a substantial cost. Laminate is used in hallways, living rooms, kitchens, and bathrooms.
After laminate flooring is laid in your home, it is not uncommon to find gaps around the edges of the floor. The floor cannot be fully flat, which is why the joint where the trim interacts with it, has a bit of variation in areas where the level of the floor is dropped. Due to this variation, the floor may appear incomplete near the edges. You can bridge this gap with a caulk tape that does not only seal the gap but also serves as the floor’s visual border. Here are three ways to seal the breaches of your laminate flooring.
1. Caulk Laminate Flooring Where It Meets a Doorway
After the laminate flooring is laid out in your home, you may realize that the area where it forms a gap exists around the doorway—ones that serve as an intermediary between your rooms. With the use of a caulk tape, you can seal the gap without any issue. Here is what you need to do.
- Turn on the vacuum cleaner to remove any dirt or debris from the gap. This is necessary because debris makes sealants ineffective. In order to ensure that your caulk adheres permanently, you have to clean the gaps thoroughly. Alternatively, you can also use scouring powder.
- Take out the caulk strips and place a heavy object on them. In this way, they are flattened properly and can adhere to any gap.
- Now measure all the gaps to cut the tape accordingly. Make sure that one piece is not continued around a corner. Cut a flat and mitered corner.
- Pre-bend all the strips. You can do this by folding them at the scoreline, so they make a 90 degrees angle.
- To apply caulk strips, choose the longest one and start with the corner. Peel a little part of the backing out of the top half of the strip. Press this half strongly against the wall. If you are not careful, then you will have to reposition the strip again in the future. For best results, work with small sections at a time. Continue by carefully removing the backing and adhere to the caulk strip.
- Repeat the last step for the bottom half of the strip.
- Continue the process for other caulk sections.
- Wait 12 hours for the caulk to get attached.
2. Caulk Your Molding Trim
- To get a lasting finish for your molding trim, use a waterproof caulk tape before you begin painting. This type of sealant does not get affected by water or any other similar factor. On the contrary, options such as acrylic caulk solidify, crack and react poorly with laminate flooring, due to which they do not only cause gaps, but they also serve as an ugly finish to your rooms.
- Cut the tape according to the gap. Apply consistent pressure to press the caulk.
- Stick caulk along the joints and edges of your molding trim. Caulk from top to bottom. Stick the tape on the top edge and go all the way down to apply it.
- Use your finger to smooth the tape into the seam for five minutes.
3. How to Use Silicone to Seal the Edges of Laminate Flooring Edges
With laminate flooring, areas having high moisture are prone to get floor damage. This happens because water can seep between the laminate panel edges and the wall. By using silicone caulking for these edges, you can make sure that the laminate panels are not warped from dampness.
- Use a wire brush to clean off any debris from the laminate flooring edges.
- Turn on the vacuum cleaner and remove all the debris from the laminate flooring edges. Clean edges are easily treated by silicone caulk.
- Put a piece of masking tape around the laminate flooring such that its positioning is parallel to the edge of the flooring that needs caulking This piece should be around 1/32 away from the edge. The purpose of this tape is to protect the flooring. In this way, the additional silicone is unable to damage the surface of the panel.
- Use a pair of snips to slice off the tip of the silicone caulk. In this way, the hole is smaller than the expected width of the edge. Make this cut at a 45-degree angle, so the caulk flow is adequate.
- Put the cut end of the caulk tape above the flooring’s edge. During this time, make sure the caulk is without any holes. You should have a continuous layer of silicone. In case you find any hole, just use the caulk tape for that area and refill it accordingly.
- Use a putty knife to scrape off any overflowing or excess silicone.
- Remove the masking tape from the floor. Give some time to the edge so it can dry fully.
Final Thoughts
While caulking your laminate flooring, you are bound to feel uncomfortable during the caulking process. Caulking can take some time, so you can get some relief in the form of protective wear. In this case, knee pads can provide significant relief. You can wear them to shield your unprotected knees. If you need any help with the peel and stick trim molding, then send us a message.
Similar Articles
A louvered pergola is an outdoor structure with a mechanically adjustable roof system. Its purpose is to regulate sunlight, airflow, and precipitation in open-air environments.
You do not always need to do a major renovation, a huge budget, or even employ a contractor to make improvements on your home.
Struggling with recurring roof repairs? Discover why issues keep coming back, from poor installation to mismatched materials, and learn how to avoid costly fixes.
Explore modern wooden tiles designs, finishes, patterns & colour trends. Discover ceramic and vitrified wood tiles for timeless, elegant interiors.
Learn how an HVAC contractor provides reliable heating and cooling through expert installation, repairs, maintenance, and energy-efficient solutions.
Gutters play a critical role in directing rainwater away from a home, yet they are often overlooked in routine maintenance. Because they sit above eye level, problems can develop quietly until visible damage appears on walls, foundations, or interior spaces.
When upgrading your bedroom, choosing the right mattress is essential for a good night’s sleep. A double mattress offers the ideal balance between comfort and practicality, making it a popular choice for couples, guest rooms, and growing teens.
Water has an uncanny ability to find its way into places it shouldn't be.
There's a particular feeling that comes with stepping into your backyard on a Saturday morning and actually wanting to be there.


